Microservices on Kubernetes: Part 1 — IDE and Tools
An important step before you begin the implementation of microservices is to configure your development IDE and install a set of tools that simplifies integration with Kubernetes. In this article, I’m going to describe the most popular of those tools.
You can find a video version of every part of this tutorial on my YouTube channel. The first part is available here: https://www.youtube.com/watch?v=88u31ouE6m8
This the first part of a guide where I’m showing tools, frameworks, and platforms that speed-up the development of JVM microservices on Kubernetes. We are going to implement sample microservices-based architectures using Kotlin language and then deploy and run them on different Kubernetes clusters.
1. Cloud Code IntelliJ Plugin
If you use IntelliJ as a development IDE and you prefer “clicking” over command line tools Cloud Code is something for you. There is also a Cloud Code plugin for Microsoft Visual Studio Code. Cloud Code comes with a set of tools to help you write, run, and debug cloud-native applications quickly and easily. It is integrated with popular tools like Skaffold, Jib, kubectl, or kustomize.
With Google’s Cloud Code you can easily run and debug your application on Kubernetes the same as you would do it during normal, local development. You just need to click the Run or Debug button on the configuration built using Cloud Code: Kubernetes template as shown below.

With Cloud Code, you can easily explore all your Kubernetes clusters that are configured inside the local Kube context. You can verify a list of workloads, services, ingresses, config maps, secrets, and others. You can easily stream logs, view a detailed description and open terminal for the selected pod. All information is exposed as a drop-down list box in a tree structure as you see in the picture below.

Finally, you can take advantage of editing support for Kubernetes manifests. You can use predefined templates for creating the most popular Kubernetes and Anthos manifests. You can use content assist for those manifests.

Of course, Cloud Code is not the only one Intellij plugin that supports integration with Kubernetes. You can use the official Jet Brains Kubernetes Plugin. The only problem is that it is available only in the Ultimate edition of IntelliJ.
2. K9S
K9s is a mid-way solution between the GUI and the command-line tool. It is a terminal-based UI to interact with your Kubernetes clusters. This project aims to make it easier to navigate, observe, and manage your deployed applications. K9s continually watches Kubernetes for changes and offers subsequent commands to interact with your observed resources.
Here’s the default screen from K9s after startup. It prints the list of available pods. You can easily print the logs of the pod, delete it, edit its YAML manifest, and much else.
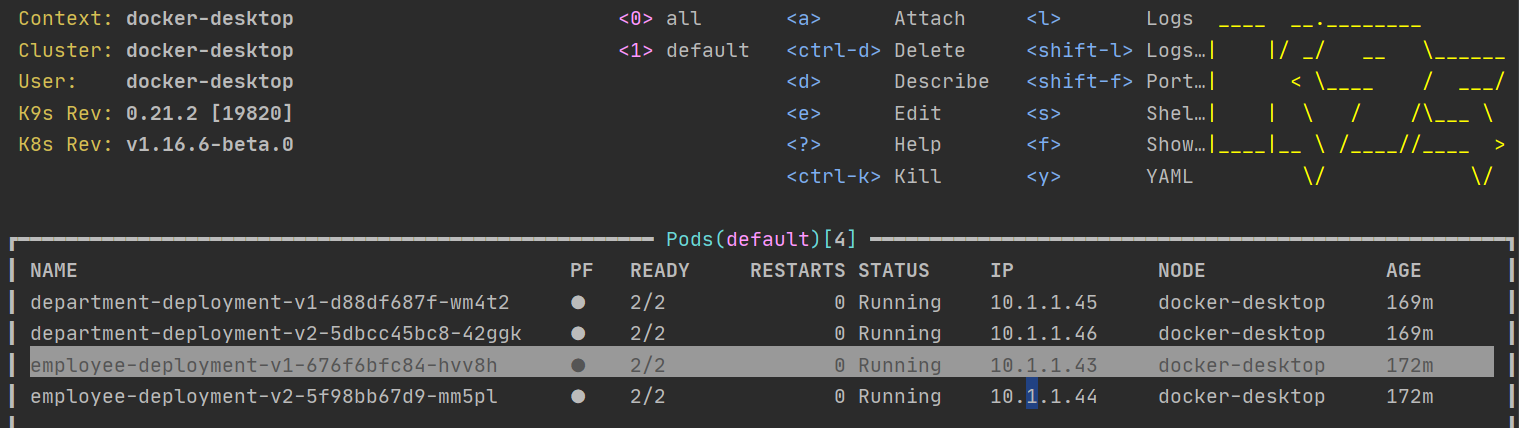
You can also easily switch between different resources just by typing “:”, and then priving the name of required Kubernetes object. Let’s say you would like to see the list of Kubernetes Services – you just need to type: svc. We can also easily switch to all namespaces view just by typing “0”.

3. CLI
Of course, you can still use just a simple kubectl command to manage your cluster. A knowledge about kubectl commands might be a useful skill. When using this simple CLI you may still install some useful command-line plugins. One of them is kubectx. It allows you to easily switch between different Kube contexts. To view a list of configured contexts you just need to execute command kubectx ls.

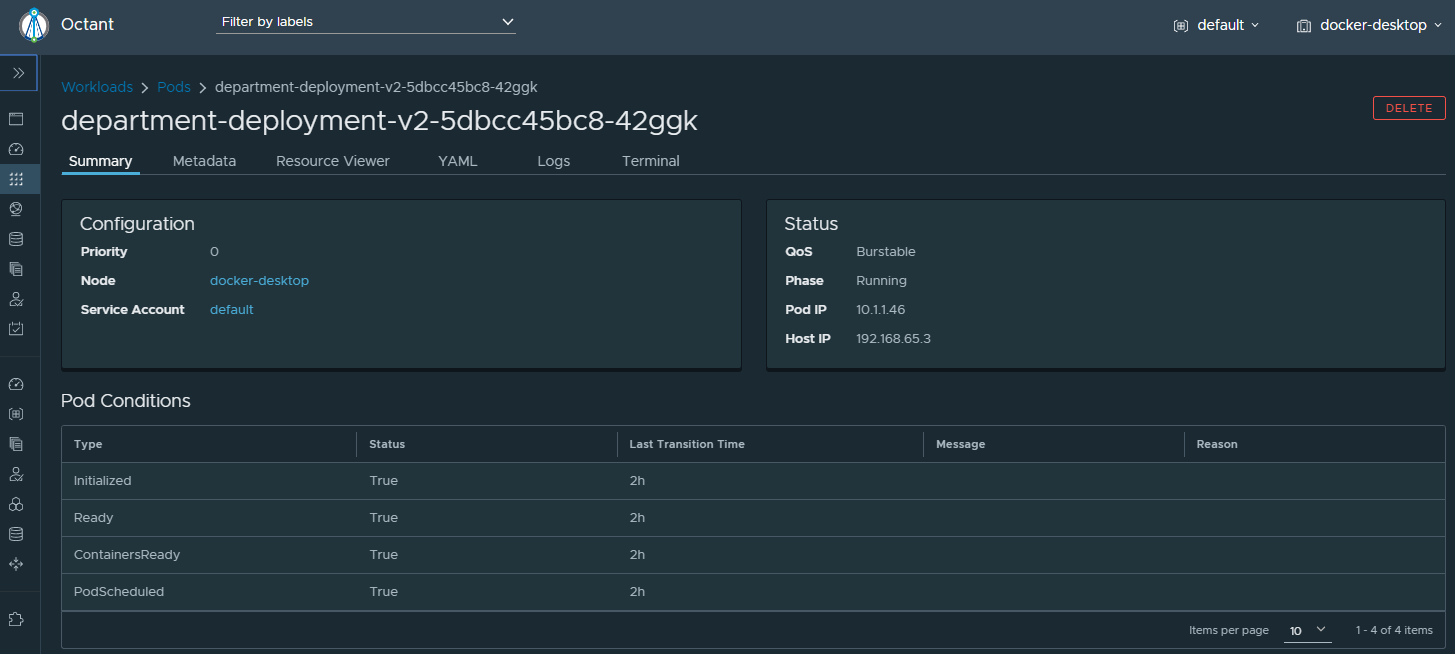
4. Octant
The last tool discussed in this article is Octant. Octant is a typical web-based UI tool. It is running locally on your machine and connects with currently set Kubernetes context. After installation, you can run it just by using command octant. If you would like to select context on startup just set parameter –context.
Octant provides many more features than a standard Kubernetes Dashboard, which is deployed directly on your cluster. By default, it is available on http://localhost:7777. You can easily view all the most important Kubernetes components, filter them by labels, or switch between namespaces.

You can also go to the details of a selected object like pod or deployment. Then you may for example stream the logs, edit YAML, open terminal, or just delete the current object.
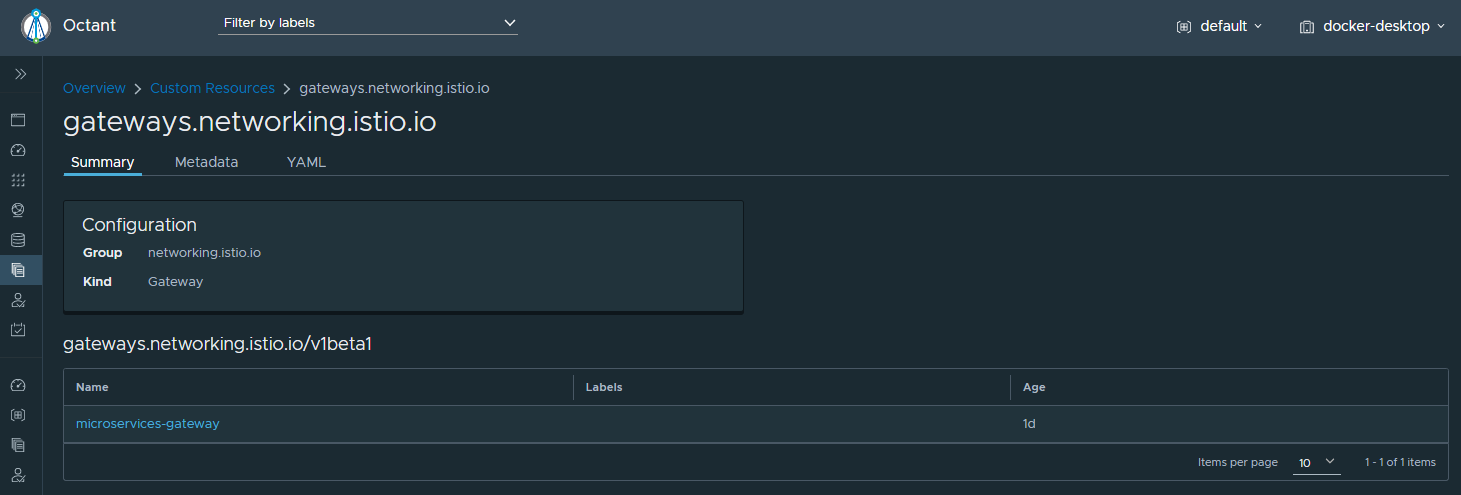
You may also display additional resources like Istio components using Custom Resources view.
Conclusion
Before starting development it is worth spending some time discovering useful tools for managing the Kubernetes cluster. As you see there is a wide selection of such tools, starting from simple command-line solutions to more advanced GUI or web-based interfaces. Once we have selected such tools we may proceed to the second phase – a setup of local or remote Kubernetes cluster for development. More about in the article that will be published soon or in my video here: https://www.youtube.com/watch?v=5tndHJXdDkE.
links
via DZone https://dzone.com
July 31, 2020 at 05:25PM
Piotr Mińkowski
